Getting started
Running in-cluster is the default. To install the prebuilt image you only need Helm (or kubectl):
# Helm (OCI)
helm install sealane oci://ghcr.io/wonjune95/charts/sealane --version 1.20.2 -n sealane --create-namespace
# or plain manifests
kubectl apply -f https://github.com/wonjune95/sealane/releases/latest/download/install.yaml
kubectl -n sealane port-forward svc/sealane 8080:8080   # → http://localhost:8080, user admin
# the admin password, generated at first start:
kubectl -n sealane get secret sealane-initial-admin -o jsonpath='{.data.password}' | base64 -d; echo
Clusters without Istio
install.yaml and the chart work with or without Istio: Sealane shows the kinds whose CRDs the cluster has, and reads the Istio control-plane version from the istiod pods in istioNamespace (default istio-system) when there are any. Before 1.19, install.yaml also created a Role in istio-system and failed to apply it without Istio; an upgraded install can delete the leftover with kubectl -n istio-system delete role,rolebinding sealane-istiod-reader --ignore-not-found.
The steps below are for building and installing from a clone. You only need Docker and Helm (the image build is multi-stage — no local Go/Node required).
1) Image
Every release tag (v*) publishes an image via GitHub Actions — use it directly:
# prebuilt image (recommended)
ghcr.io/wonjune95/sealane:1.20.2     # or :latest
Or build your own:
docker build -t <registry>/sealane:<tag> .
docker push <registry>/sealane:<tag>
2) Helm install
helm install sealane ./charts/sealane -n sealane --create-namespace \
  --set image.repository=<registry>/sealane --set image.tag=<tag>
The published image is multi-arch (amd64/arm64) and signed with cosign (keyless); see Releasing for the verification command.
Key values: image.*, imagePullSecrets (private registries), replicaCount (stateless — scale for HA), accountsConfigMap, clustersSecret, requestTester.enabled (real request tester — off by default; enabling it grants pods/exec), sessionSecret.* (stable session-signing key), ingress.*, httpRoute.* (expose via Ingress or Gateway API), oidc.* (single sign-on, see Authentication). The full table is in Configuration. The pod runs distroless non-root (uid 65532) with readOnlyRootFilesystem.
3) Expose
Expose it to match your cluster:
# with Gateway API — adjust parentRefs/hostname first
kubectl apply -f examples/httproute.yaml

# with an Ingress controller — create an Ingress backed by service sealane:8080
The chart can also create either one for you: httpRoute.enabled=true (with httpRoute.parentRefs / hostnames) or ingress.enabled=true (with ingress.className / hosts / tls).
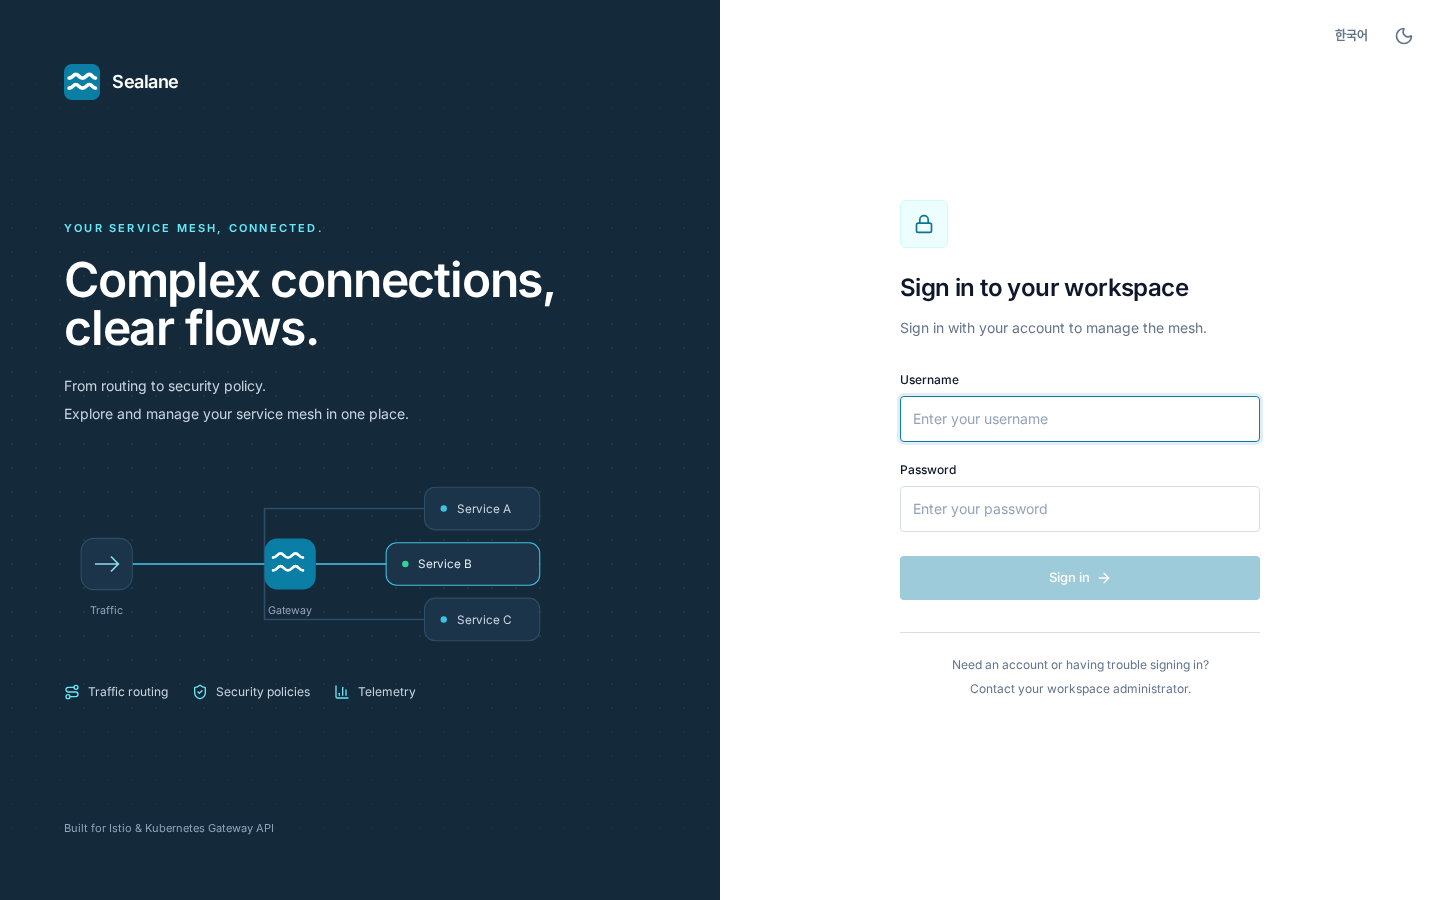
4) Log in
On first boot Sealane creates the account admin with a random password and stores it in Secret sealane-initial-admin (<release>-initial-admin with Helm):
kubectl -n sealane get secret sealane-initial-admin -o jsonpath='{.data.password}' | base64 -d; echo
Sign in with it and change the password in Settings. An install upgraded from before 1.19 whose admin still has the password admin goes straight to a password-change screen instead.
5) Add accounts
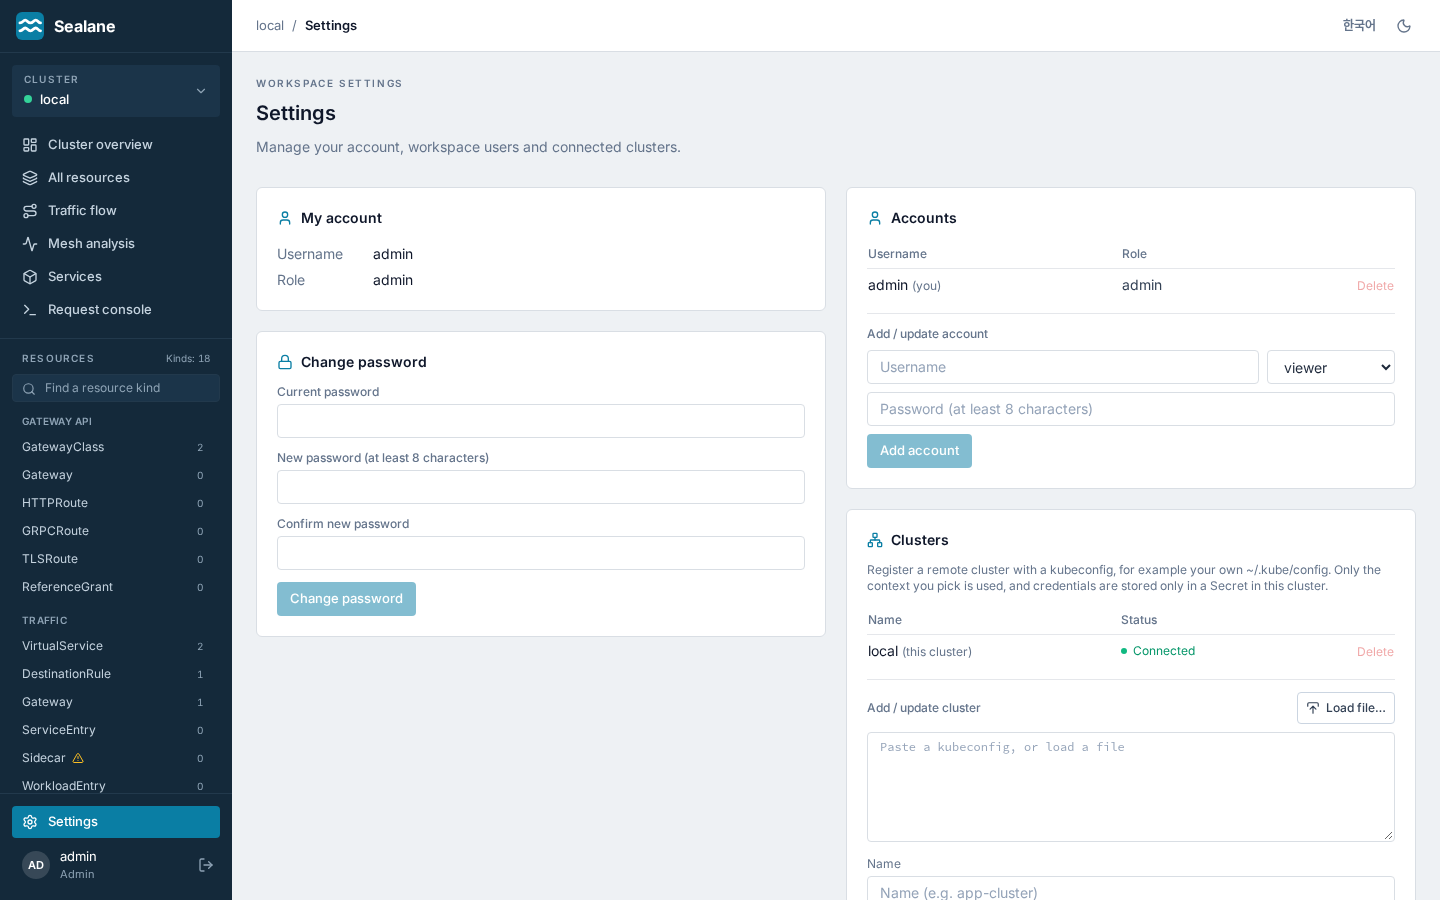
As admin, use settings → account management to add accounts and change roles/passwords in the UI (self-delete, self role-change, and deleting admin are blocked). The store is still a ConfigMap, so kubectl works too:
go run ./hack/bcrypt-hash.go 'password'                      # generate bcrypt hash
# (without Go) htpasswd -bnBC 10 "" 'password' | tr -d ':\n'
kubectl -n sealane edit configmap sealane-accounts
# add to data:  username: "role:hash"   (role: admin | editor | viewer)
No restart needed: Sealane reads it through the API and applies it within seconds. See examples/accounts-configmap.yaml.
To let people sign in with your identity provider instead, see Single sign-on (OIDC).
6) Register more clusters (optional)
To manage multiple clusters from one Sealane install, go to settings → cluster management as admin, paste or load your kubeconfig and pick the cluster's context. By default Sealane uses those credentials once to create a limited sealane-remote account on that cluster and stores only that account's token, in the sealane-clusters Secret next to Sealane. A connectivity test runs on registration, and the cluster menu at the top of the sidebar switches clusters. See Multi-cluster.
After installing
① change the admin password (forced at first login) ② add accounts (settings → account management) or turn on single sign-on ③ for multi-cluster, register kubeconfigs (settings → cluster management).
Uninstall with helm uninstall sealane -n sealane; the accounts, registered clusters, session key and history it created stay in the namespace until you delete it (kubectl delete namespace sealane). With install.yaml, kubectl delete -f install.yaml deletes the namespace and all of that at once. See Operations.